Get started
Welcome to the get started guide! This guide will show you how to get started with SignInSimply quickly and easily. If you don't find answers to your questions here, please check out our FAQ, or go ahead and contact us.
- Setup
- Administration page, logging in and logging out
- Add users
- Customize sign-in page
- Customize sign-in fields
- Add terms of visitation
- Add visit reasons
- Set an auto sign out time
- Add custom name badge text
- Enable name badge printing
- Functions
Setup
Administration page, logging in and logging out
To access the visitor management system's administration page or log in or out of the system, an administrator or viewer must enter their email address and password. This is so that visitors and other unauthorized users won't be able to access sensitive information, change settings or log out by accident.
Add users
To ensure that hosts are searchable, and that they receive an email and/or SMS when their visitors sign in or out, they must be added as users. System owners, who should be able to administrate the system, also need to be added as users. There are different system roles which determine which features and pages the user can access in the system. Read more about the roles below.
Roles
There are three different roles in the visitor management system: Admin, Viewer and Host.
Admin: This is the highest role in the system and is intended to be used by system owners. Admins can access the sign-in page and all pages under Administration. They can, for example, change settings, add and remove users, add visit reasons etc.
Viewer: Users with this role can access the sign-in page as well as Administration → Visitor log and Administration → Preregistered visits. The role is intended to be used by, for example, receptionists and evacuation coordinators. Viewers can see the visitor log, but cannot change settings or add and remove users.
Host: Users with this role can only access Administration → Preregistered visits. Hosts can only see and edit their own preregistered visits. The role is intended to be used by employees who receive visitors. Hosts cannot access the sign-in page.
Add users manually
To add individual users manually, go to Administration → Users and click on "Add user". Enter details and click "Save".
A secondary email can be added if the user would like to have emails sent to two different addresses on visits.
Import users from Excel sheet
To import users from an Excel sheet, go to Administration → Users. Click on "Import users" and then "Download import template". Open the import template and fill it with users. The following fields are included in the import template:
- First name
- Last name
- Suffix – extra information about this user which will be displayed in the "Visiting" dropdown menu on the sign-in page, e.g. their department, role or nickname.
- Email – used to send visit notifications via email to the user.
- Secondary email – used if the user wants visit notifications sent to an extra email address.
- Country code – country code for the user's mobile number, e.g. 46 for Sweden.
- Mobile number – used to send visit notifications via SMS to the user.
- Email on sign-in – if the user wants to receive an email notification when their visitors sign in.
- SMS on sign-in – if the user wants to receive an SMS notification when their visitors sign in.
- Email on sign-out – if the user wants to receive an email notification when their visitors sign out.
- SMS on sign-out – if the user wants to receive an SMS notification when their visitors sign out.
The following fields are required for the user to be included in the import:
- First name
- Last name
- Email or country code and mobile number
All users must have a unique primary email address. On import, a number of random characters will be appended to any email addresses that are already in use by another user.
When the template has been filled in and saved, click on "Browse" and select the import template. Finally, click on "Import".
NOTE: It is important that the import file does not contain data outside the defined columns and that the column headers are the same as the import template's, otherwise an error will be shown on upload.
Send welcome emails
For users to be able to log in, they need to have a password. If you have added users manually and assigned them an "Admin" or "Viewer" role, a welcome email is sent to them automatically. However, if you've added users with the "Host" role, or imported them from an Excel sheet, no welcome email is sent automatically. To send them a welcome email containing a link to set their password, go to Administration → Users, select which users to send a welcome email to, and click on "Send welcome emails to selected".
Customize sign-in page
The sign-in page can be customized with a logo as well as a background image or background colour. The logo will be displayed above the sign-in dialog – if you would like to place it elsewhere we suggest that you add it directly to the background image in the desired position with the help of image editing software.
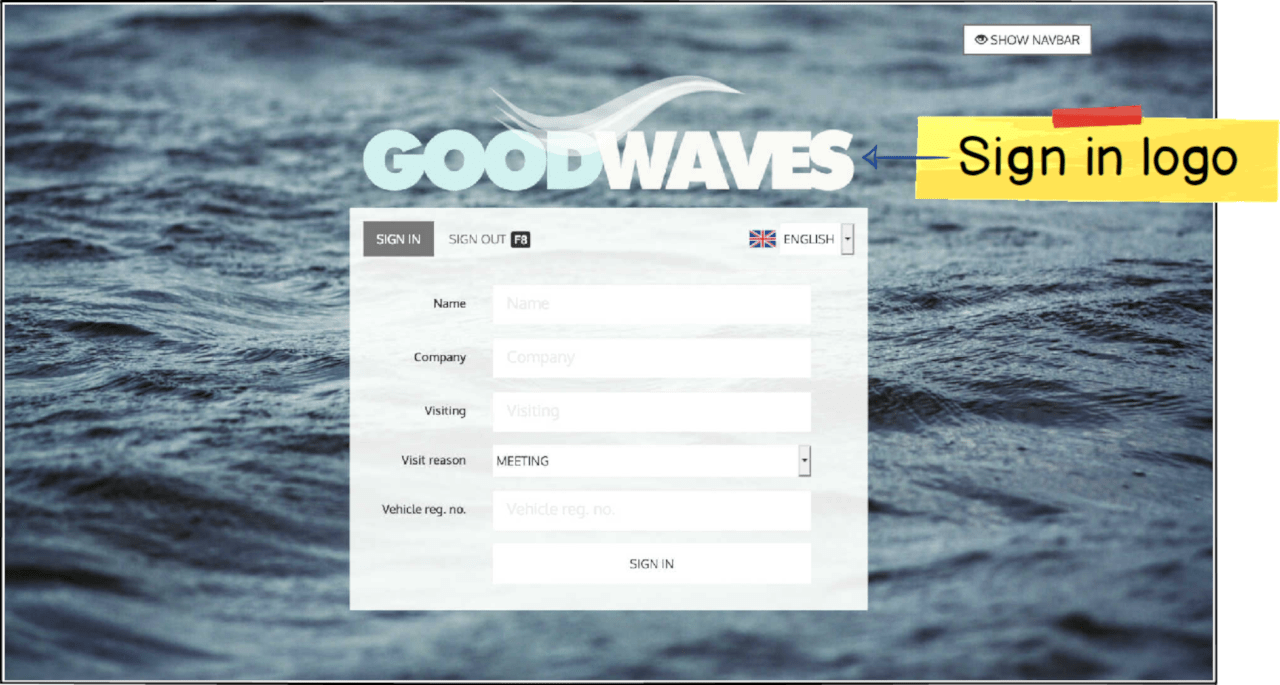
To add a sign-in logo and background image, go to Administration → Settings. Click on "Browse" beside the label "Sign-in logo" and select the file you would like to upload. Hover over the icon for more information regarding maximum allowed dimensions and file size. Repeat the same process for the background image. Remember to select "Custom" in the "Background type" dropdown if you are uploading a background image. Finally, click "Save".
If you don't want to use a background image you can instead select a plain background colour with the colour selector or by entering a hex code directly in the "Background colour" input field. You must also select "None" in the "Background type" dropdown.
Customize sign-in fields
It is possible to customize the sign-in fields in the sign-in dialog by hiding the "Company" field and adding a custom sign-in field.
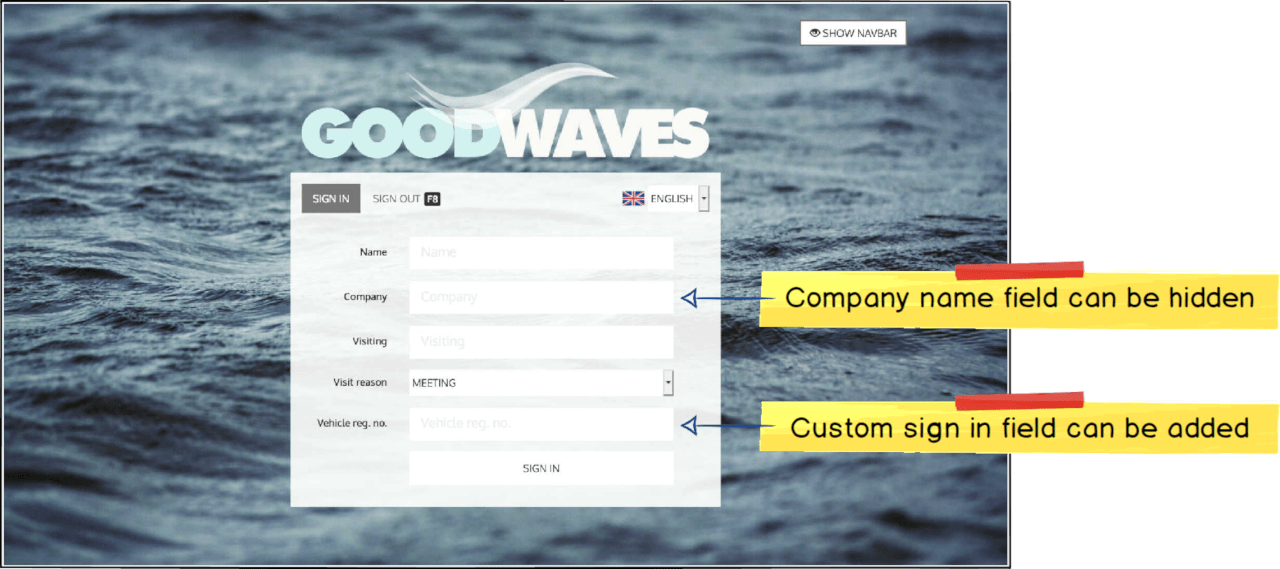
The "Company" field can be hidden by unchecking the "Show Company field" checkbox under Administration → Settings. When the field has been hidden it will also be excluded from the visitor log.
You can add a custom sign-in field to the sign-in dialog by defining a name for the field in "Custom sign-in field" under Administration → Settings. The information entered in the custom sign-in field will be shown in the visitor log and is also included in the message to host. For example, the field can be used to let the visitor register their phone number, visitor badge number or vehicle registration number.
Add terms of visitation
You can upload a PDF file containing terms of visitation which visitors must accept in order to sign in. By clicking the link to the terms of visitation in the sign-in dialog, the PDF file is displayed in an overlying window.
Upload the PDF file under Administration → Settings → Terms of visitation PDF.
Add visit reasons
Add custom visit reasons under Administration → Visit reasons by clicking on "Add visit reason". Custom visit reasons will be listed before default visit reasons in the "Visit reason" dropdown, in the order they were created. There are three default visit reasons which cannot be deleted: Meeting, Training and Service & maintenance.
Set an auto sign out time
An auto sign out time can be set in "Auto sign out time" under Administration → Settings if you would like visitors to be signed out automatically in case they have not signed out themselves by the end of the day. Visitors have until 00:00 to sign out, otherwise the defined sign out time will be set in the visitor log.
Add custom name badge text
A custom name badge text can be defined in "Custom name badge text" under Administration → Settings. This text will be shown on the name badge under the sign out time and sign out code. For example, the text can be used to inform visitors of login details for wireless networks.
Enable name badge printing
Enable automatic name badge printing from the visitor management system by checking "Use Dymo printer" under Administration → Settings.
You must also ensure that:
- The DYMO printer is correctly connected to the visitor terminal
- The latest DYMO software is correctly installed on the visitor terminal
- DYMO Connect Web Service software is running in the background
Troubleshooting
If the name badge does not print
- Ensure that "Use Dymo printer" is checked under Administration → Settings.
- Check that the latest DYMO software is correctly installed. You must perform a full installation, including DYMO Connect Web Service.
-
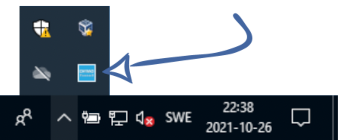
Ensure that DYMO Connect Web Service is running in the background. There should be a DYMO icon in the toolbar. Right-click the icon and select "Diagnose". A window should pop up saying "DYMO Connect Service is running on port 41951". If you instead see an error, it is likely that a local firewall is blocking traffic to/from the service. Contact your internal IT department to get DYMO Connect and TCP port 41951 whitelisted.
-
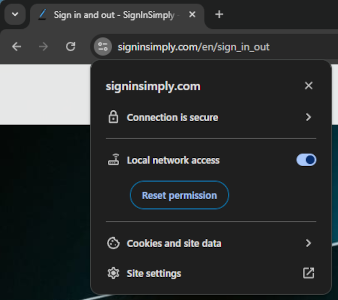
If you are using Google Chrome or Microsoft Edge, ensure that connections to local network devices are allowed. To check this, click the website settings icon to the left of the address bar when on the sign-in page, and ensure that "Local network access" is turned on.

- Check that both the computer and the DYMO software are set to a language that uses the metric system, otherwise the system may lack support for the metric-based label templates that SignInSimply uses (US English will not work). Reinstall the DYMO software if you change the computer's display language.
- Click here to check that the software is correctly installed and that DYMO Connect Web Service is running and working. If "false" is shown on any of the rows, try reinstalling the DYMO software.
- Check that you are running the correct version of the DYMO software for the label type you have selected. Label types ending with "(DYMO CONNECT)" in the dropdown menu under Administration → Settings only work with DYMO Connect, not the older DYMO Label Software.
- Ensure that you don't have multiple DYMO printers installed. Name badges may be being sent to the printing queue of an inactive printer.
- Try restarting the web browser.
- Try another web browser.
- Try restarting the computer.
If the problem persists, contact us for further support. In your message, include information regarding which operating system the visitor terminal is running, what version of the DYMO software is installed, and the results of the test in step 5 above.
If parts of the text are printed outside of the name badge
This is likely due to that you either have a label type in the printer that SignInSimply does not support, or the label type that you have selected under Administration → Settings is not the same as the label type that you have in your printer. SignInSimply only supports the following label types:
- Small name badge 41 x 89mm (S0722560)
- Name badge 54 x 101mm (S0722430)
- Name badge cards 51 x 89mm (non-adhesive) (S0929100)
Functions
Visitor log
The visitor log can be found under Administration → Visitor log. It shows an overview of all visits and their current status. The log can be filtered by date range and host, and you can choose to filter only currently signed in visitors. By clicking the Excel icon, you can export the visitor log to an Excel file.
From the visitor log, you can take multiple actions on each visit using the buttons in the right-most column in the table. By clicking on the printer icon, you can reprint name badges for visitors who are currently signed in. Note that this will only work from devices that have a correctly installed Dymo printer. By clicking on the sign-out icon, you can sign out a currently signed in visitor.
Pre-registered visits
This function allows users to add one or more visitors to the system prior to their arrival in order to speed up the sign-in process. Once the visitors arrive, the user can then sign them all in with one click. If their computer has a Dymo printer correctly installed, they can also print the name badges in advance of the visitors' arrival.
To add a pre-registered visit, go to Administration → Pre-registered visits and click on "Add pre-registered visit". Enter details and click "Save". You can enter multiple visitors for the same visit by separating their names with a comma. The expected arrival time is displayed on name badges if they are printed in advance of the visit, otherwise the actual sign-in time is displayed.
Once a pre-registered visit has been added, you can take multiple actions on it using the buttons in the overview list. From left to right:

- Edit pre-registered visit.
- Copy pre-registered visit. This will create a copy of the pre-registered visit that you can edit before saving.
- Sign in pre-registered visit (without printing name badges). The visitors will be moved to the visitor log and the host will be notified of their arrival.
- Sign in pre-registered visit (and print name badges). The visitors will be moved to the visitor log and the host will be notified of their arrival.
- Print name badges (in advance of the visitors' arrival). Name badges will be printed, but the visitors will not be added to the visitor log and the host will not be notified of their arrival.
- Delete pre-registered visit.